Course Guide
All official college policies are in your course outline. This page explains how the course works, what I expect from you, and my recommendations for getting the most out of it.
General Advice
Section titled “General Advice”Read. I’m serious. This is becoming rarer as time goes on. If you want to get ahead in this world, read the whole email, page, instructions, whatever it is, just read it and understand the content in its entirety before making any assumptions.
If you’re not a gamer, don’t worry! You don’t have to be. This course is actually Programming 5 (look at the course number) which means it’s just advanced programming. And if you’ve made it this far, chances are you’re comfortable around code.
AI Usage
Section titled “AI Usage”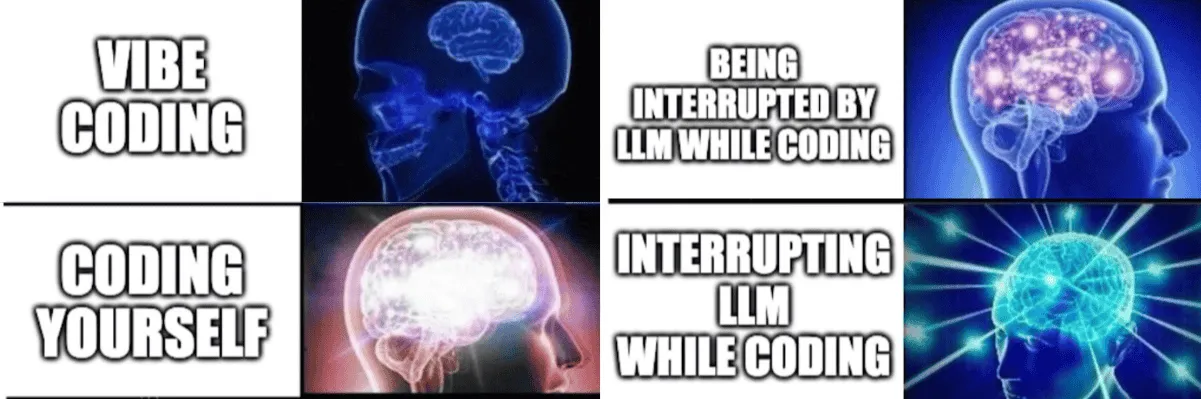
I cannot realistically ban or monitor how you use AI at home. You are going to make your own choices. What I want you to understand is that having AI do the work for you undermines the practice this course is designed to provide.
Programming is learned by working through confusion: reading unfamiliar code, forming a plan, making mistakes, debugging them, and explaining why your solution works. AI removes that productive struggle instantly and cannot give you the understanding you skipped. That gap shows up when you need to debug on your own, take a quiz, explain your code to me, or build the next project without a ready-made answer.
Use AI as a guide instead of a replacement for your own thinking. It can be genuinely useful for explaining concepts, helping you interpret an error, reviewing code you wrote, or asking questions that help you find the next step. You are still responsible for understanding and being able to explain your work.
If you elect to use an LLM, always start with this copyable prompt:
I am a programming student. My goal is to learn how to solve this myself, not to receive the answer.
Do not write code, provide a solution, give me a patch, give me pseudocode, or tell me the exact steps to implement it. Instead, act as a _Socratic tutor_. Ask me one leading question at a time, help me identify what I already understand and what I should investigate next, and check my reasoning before moving on.
You may explain concepts, documentation, code I provide, or error messages I share, but do not fix the problem for me. Help me develop a debugging strategy and point me toward relevant concepts or documentation.
Assignment/context: [describe the task]What I have tried: [describe your approach, code, or error]
Whether you use an LLM or not, you must explicitly cite your usage in the devlog.
Communication
Section titled “Communication”All course announcements are posted on Microsoft Teams, and I respond to messages on Microsoft Teams. If you ever have any questions, message me on Teams first. I answer within standard business hours, 9:00-5:00, Monday through Friday. I have office hours posted on my door and you may arrange to meet with me by appointment if you prefer, but Teams is my standard. I will respond to MIOs as well, but you’ll get a response saying “See reply on Teams”. I’ve said the word “Teams” too many times.
Course Structure
Section titled “Course Structure”The four platforms for this course are:
- Moodle (calendar, quizzes, and peer assessment workshops)
- This course site (notes, tutorials, reference material)
- Teams (communication)
- GitHub (work submissions)
The course is structured into roughly 2 week chunks. The first week a new game is introduced and we build it up incrementally, learning new game dev concepts along the way. The second week is dedicated to that game’s assignment where you will be tasked with adding additional features to the game. The following week (i.e. first week for the new game) starts with a quiz assessing the concepts and codebase knowledge of the previous game.
stateDiagram-v2
	direction LR

	[*] --> Quiz
	Quiz: Beginning of Week 1
	Quiz: Quiz on the previous game's concepts and codebase
	Quiz --> Week1

	state "Week 1: Learn a New Game" as Week1 {
		[*] --> IntroduceGame
		IntroduceGame: Introduce a new game
		IntroduceGame --> Tutorials
		Tutorials: Read notes and complete tutorials
		Tutorials --> BuildIncrementally
		BuildIncrementally: Build the game incrementally in class
		BuildIncrementally --> LearnConcepts
		LearnConcepts: Learn new game-development concepts
		LearnConcepts --> [*]
	}

	Week1 --> Week2

	state "Week 2: Extend the Game" as Week2 {
		[*] --> StartAssignment
		StartAssignment: Start the assignment from the course codebase
		StartAssignment --> AddFeatures
		AddFeatures: Add and test new features
		AddFeatures --> DocumentProcess
		DocumentProcess: Write your dev log and disclose AI use
		DocumentProcess --> Submit
		Submit: Submit your work to GitHub
		Submit --> [*]
	}

	Week2 --> Quiz

	classDef assessment fill:#f9e2af,stroke:#f5c2e7,color:#1e1e2e
	classDef learning fill:#89b4fa,stroke:#74c7ec,color:#1e1e2e
	classDef development fill:#a6e3a1,stroke:#94e2d5,color:#1e1e2e
	classDef submission fill:#cba6f7,stroke:#f5c2e7,color:#1e1e2e

	class Quiz assessment
	class IntroduceGame,Tutorials,BuildIncrementally,LearnConcepts learning
	class StartAssignment,AddFeatures,DocumentProcess development
	class Submit submission
Tutorials
Section titled “Tutorials”Tutorials are interactive walkthroughs of the games. These are to be completed before starting the corresponding assignment. Doing the tutorial will teach you how the game is fundamentally built, walk you through the code, and explain the high level concepts introduced for that game. Attempting the assignment before doing the tutorial is a bad idea.
Assignments
Section titled “Assignments”After learning about the current week’s game by doing the tutorial and coming to class, you’ll have one entire week of class time to work on the assignment. The codebases for game programming assignments are LARGE so I give enough time for you to become intimately familiar with the code and to rock your implementation.
Dev Log
Section titled “Dev Log”Every assignment must include a .devlog.md file in the project root. This file is your design diary. It’s where you document how you approached the assignment, what decisions you made, what challenges you encountered, and how you worked through them, including how you used any AI tools. Dev logs have been popularized by indie game developers and usually take the format of video, but yours will be markdown text.
This is not a summary of your final product (that’s what your code and commit messages show). Instead, it’s a reflection of your process and thinking.
What to write:
- What approach you chose and why
- Any bugs or roadblocks you encountered and how you solved them
- How you tested and verified your implementation
- What did you learn? Think big “aha!” moments
- If you used AI tools (e.g. ChatGPT, Claude, Copilot), describe:
- What you asked
- What it returned
- What you kept or changed
- Include links to relevant chat logs when possible
What makes a good devlog:
- Specific technical insights (e.g. “I struggled with connecting the AI paddle’s movement to the ball’s position. I solved this by…”)
- Honest reflection on what you understood and what confused you
- Commentary on any AI output you received, what was useful, what wasn’t
What makes a weak devlog:
- Restating the assignment prompt
- Only describing what the final code does, without process
- Hiding or omitting AI tool usage
- Generic statements with no technical substance
Be concise. Bullet points and informal language are fine. I don’t care about the occasional typo, but your devlog should be readable.
| Criteria | Standard |
|---|---|
| Process Reflection | Clear explanation of approach, design decisions, and problem-solving steps |
| Technical Detail | Specifics about code structure, logic, or bugs encountered and fixed |
| AI Usage Disclosure | Clearly explains how AI was used, what was kept/changed, with reasoning |
| Insight & Critical Thinking | Thoughtful reflection on what was learned, understood, or found challenging |
| Clarity & Format | Concise, readable, well-structured with bullet points or short paragraphs |
AI Involvement Category
Section titled “AI Involvement Category”At the top of your .devlog.md, you must declare your AI involvement category by selecting the option that best describes how you used AI during the assignment:
| Category | Description |
|---|---|
| No Use | You did not use any AI tools at any point. |
| Tutor | You used AI to explain code, concepts, or errors. No code was generated by AI. |
| Assistant | You asked AI for code suggestions or snippets and integrated them with understanding. |
| Reviewer | You wrote the code yourself, then used AI to review, critique, or suggest improvements. |
Peer Assessment
Section titled “Peer Assessment”You’ll use the Moodle Workshop feature to give feedback on 3 of your peers’ submissions. Peer assessment is a core developer skill. Reading others’ code and giving constructive feedback is something you’ll do constantly in real software teams. It also helps you improve your own work by seeing how others solved the same problem.
Code Walkthrough
Section titled “Code Walkthrough”For each assignment, I will randomly select a few students for a short (10-15 minute) one-on-one code walkthrough. You’ll be asked to explain your implementation, reflect on your design decisions, and answer a few questions. This helps ensure understanding, promotes academic integrity, and prepares you to communicate your work which is an essential skill for every developer. You can be selected for any assignment, so always be ready to walk me through your code.
We will be using GitHub to submit in this course. You can use either the Git CLI or you can also use VSC’s built-in Git GUI client.
| Visual Studio Code (GUI) | Command Line (CLI) | |
|---|---|---|
| 1 | Click the Source Control icon (third down on the left sidebar) | git status - View changed files |
| 2 | Click + to stage all changes, or + next to individual files |
git add . or git add <filename> - Stage changes |
| 3 | Type a commit message in the text box, then click the ✔ to commit | git commit -m "Your message" - Commit staged changes |
| 4 | Click ... and choose Push to upload your commit to GitHub |
git push - Push commits to GitHub |
GitHub date is the definitive submission timestamp. The last commit on an assignment branch is the one that will be used to determine if your submission is counted as late or not.
Extension Coupon
Section titled “Extension Coupon”You have one free assignment extension coupon for the semester. You may redeem it at any point before the deadline. No questions asked. You’ll get the full +X days (depending on the assignment’s late policy) sans penalty.
Quizzes
Section titled “Quizzes”- Quizzes happen at the beginning of class, which means if you are late, you will miss your quiz. Arrive to class early. To arrive on time is to arrive late. Expect to spend precious minutes booting up your computer, logging in and fiddling with 2FA, finding the correct link in Moodle, etc.
- Speaking of, quizzes happen on Moodle. They’re usually 10-20 minutes long and assess the previous game’s knowledge. So if you just submitted the Mario assignment, for example, the quiz will be on the code and concepts learned doing Mario.
- Quizzes are two-stage assessments. This means you do the quiz once by yourself for half the points, then redo the quiz in groups of 3 for the other half. The majority of the time the group grade is higher as I’m sure you can guess. If for any reason you do stellar on the individual, but the group brings you down, your individual will count for the whole.
- The lowest quiz grade is automatically dropped.